
Pineapple Upside Down Cake

Who doesn’t love a bit of retro? Depending on the decade in which you were born in though, retro could be anything from shoulder pads & Rubik’s cubes to popper trousers & Tamagotchi’s (probably giving away my own era there). Fashions of the past aside, retro is a term that we also apply to food.

Usually when a food is thought of as ‘retro’ it means that it has most definitely fallen out of fashion. Through no fault of its own, it’s been left in the past, almost forgotten, to make way for newer & exciting things. But, did you ever stop to think that these retro foods were both new & exciting in their time? Generally, when people refer to foods from the past, if they call something retro, then they are remembering it fondly.

Personally, much like traditions, I think it’s important to keep these foods & recipes alive. I will admit though, I’m a bit of a nerd when it comes to old fashion baking. I am that person who prioritises any food history programme above anything Netflix has to offer. I’ll be the girl carefully scouring over the old dusty books in an antiques or charity shop hoping to find a little window into times of baking past (I’m utterly convinced that I’m an old lady trapped in a young[er] woman’s body sometimes).

One such recipe that does appear time & time again in said dusty old books is one that has probably stood the test of time the most, pineapple upside down cake. But this retro favourite may be older than you imagined… upside down cakes is a centuries old technique from when cakes (& pretty much everything else) were cooked in cast iron skillets.

It was easier to add fruit (usually apples or cherries) & sugar to the bottom of the pan & pour over as simple batter to cook away over the fire. Turning out the cake by inverting it was a natural way to let the sweet, sugary fruit juices run into the cake as well as showing off the lovely fruit at the bottom (or now top).

It wasn’t until 1903 that the pineapple came to be in these upside down skillet cakes. This was when the slicing & canning of pineapple rings came about thanks to James Dole, an American entrepreneur who founded the pineapple canning industry in Hawaii. Thanks to some clever marketing it wasn’t long until this convenient & pretty fruit made its was into the skillet cake. The pineapple upside down cake quickly became a favourite for party & celebration cakes.

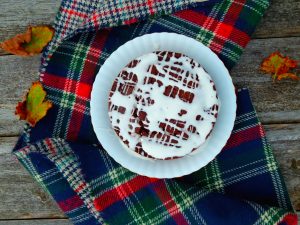
It’s not hard to see why this cake has stood the test of time, not only does it’s glistening display or exotic, caramelised fruit make it look inviting but combine this sweet, sticky top with a light, airy, sponge that is steeped in the sweet syrupy juices from the pineapple & it doesn’t half make your mouth water (if M&S did blogging)! This cake is luscious in every sense of the word, a flavour & texture like no other.

Pineapple Upside Down Cake
- Author: Katie Lewis
- Yield: 23cm round cake
Ingredients
- 5 pineapple rings (from pineapples tinned in juice)
- 11 glace cherries
- 100g butter
- 100g caster sugar
- 100g self raising flour
- 1/2 tsp baking powder
- 2 eggs
For the syrup:
- 120 ml pineapple juice from the tin
- 30g caster sugar
Method
- 1. Grease and line a round 23cm baking tin with baking parchment
- 2. Begin by preparing the syrup, place the pineapple juice & sugar in a saucepan & stir over a low heat until the sugar has dissolved
- 3. Once the sugar has dissolved, increase to a high heat & bubble for 5-10 minutes until the mixture begins to thicken & become syrupy
- 4. Brush the inside of the prepared cake tin with the syrup mixture, reserving a little for later
- 5. Arrange the pineapple slices inside the tin, using the syrup to help them stay in place
- 6. Use the glace cherries to fill the holes of the pineapples & any gaps
- 7. In a large bowl beat together the butter & sugar until light & fluffy
- 8. Add the eggs into the mixture, one at a time, beating between each one
- 9. Sift over the flour & baking powder & mix until just combined & no dry pockets of flour remain
- 10. Carefully spoon the mixture over the fruit in the tin, being careful not to move anything too much
- 11. Bake at 180C for 35 minutes, until golden & it springs back when gently pressed with a finger
- 12. Leave the cake to cool in its tin for 10 minutes
- 13. To remove the cake, carefully upturn the tin onto a plate to release it from its tin & gently remove the baking parchment
- 14. Brush the top of the cake with the reserved syrup to glaze
- Prep Time: 15 mins
- Cook Time: 15 mins
You Might Also Like:


Comments (No Comments)

Hi! I'm Katie!
This is a test placeholder and it will be updated
Leave a Reply